A compressed image can remain too large because the chosen format is inefficient for its content, the target is best effort rather than absolute, or the image contains more pixels than the byte limit can support. First check output format and exact bytes. Change format before resizing, then reduce maximum width only when the destination allows it.
Our test source was a 2,976,317-byte PNG. Re-encoding it as PNG produced 3,449,964 bytes: compression completed, but the file became 15.91% larger. Auto output with a 200KB target returned a 196,308-byte WebP at the original dimensions. Limiting width to 1200px reduced it further to 157,426 bytes.
What the failed result tells us
The source is a detailed coastal scene, not a simple logo. PNG has to preserve that detail losslessly, so forcing PNG prevented the encoder from using the kind of lossy photo compression available in JPG or WebP. The word “compress” describes an encoding operation; it does not guarantee the new representation is smaller than the existing file.
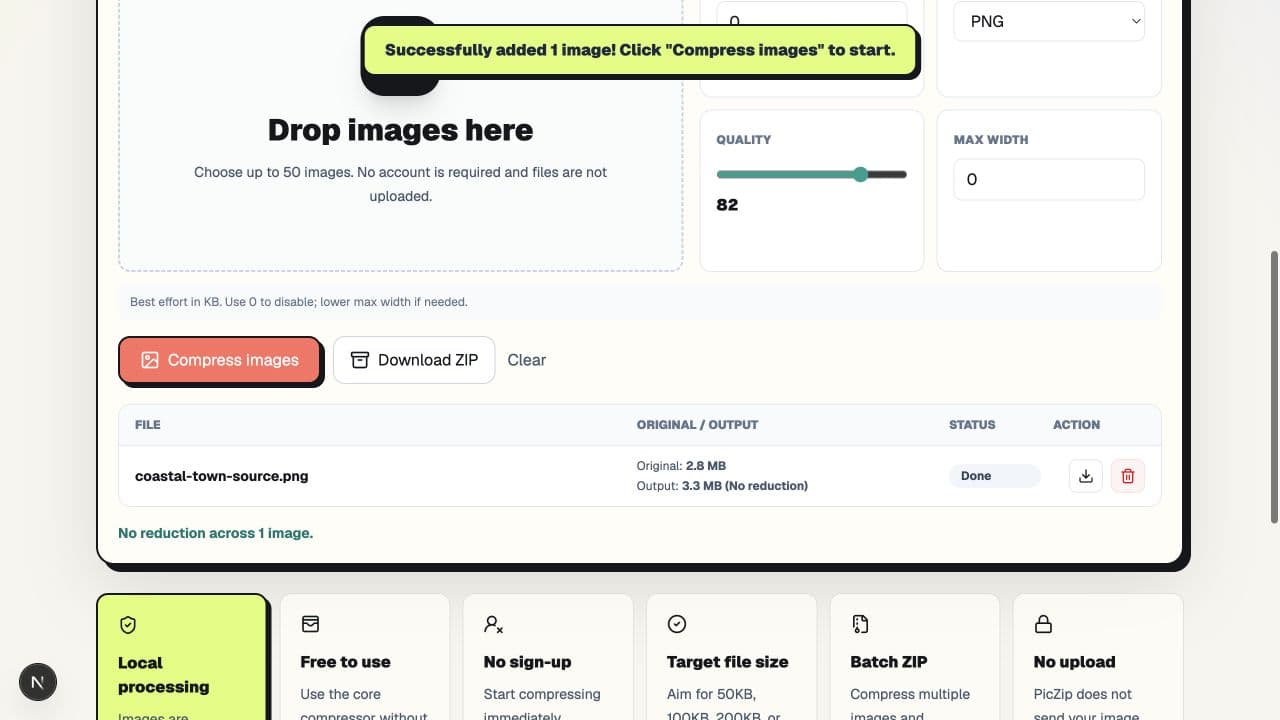
Keep the original when an output grows. Do not download a larger file merely because the status says Done.
Check 1: Is the output format required?
If the destination accepts JPG or WebP, try Auto first. For photographs, these formats can represent visual detail with far fewer bytes than lossless PNG. In our 200KB run, Auto chose WebP and returned 196,308 bytes at 1536×1024.
Do not change format when transparency, a specified extension, or a downstream editing workflow requires PNG. In that case, the honest answer may be that this source cannot reach the requested size without reducing dimensions or color information.
Check 2: Is the target an exact promise?
PicZip treats target size as best effort. It searches available encoder settings, but some combinations of content, format, and dimensions cannot reach a tiny target acceptably. Different services may also interpret KB as 1000 or 1024 bytes.
Check the exact downloaded byte count. A rounded label such as 192KB is convenient for scanning, but a strict form may enforce a different threshold. Leave margin rather than aiming for the last byte.
Check 3: Are the dimensions larger than needed?
If format and quality are already appropriate, compare source dimensions with the actual display requirement. Our original-dimension result was 196,308 bytes. Setting Max width to 1200 produced a 1200×800 WebP of 157,426 bytes, creating 47,374 bytes of headroom below PicZip's 204,800-byte target.
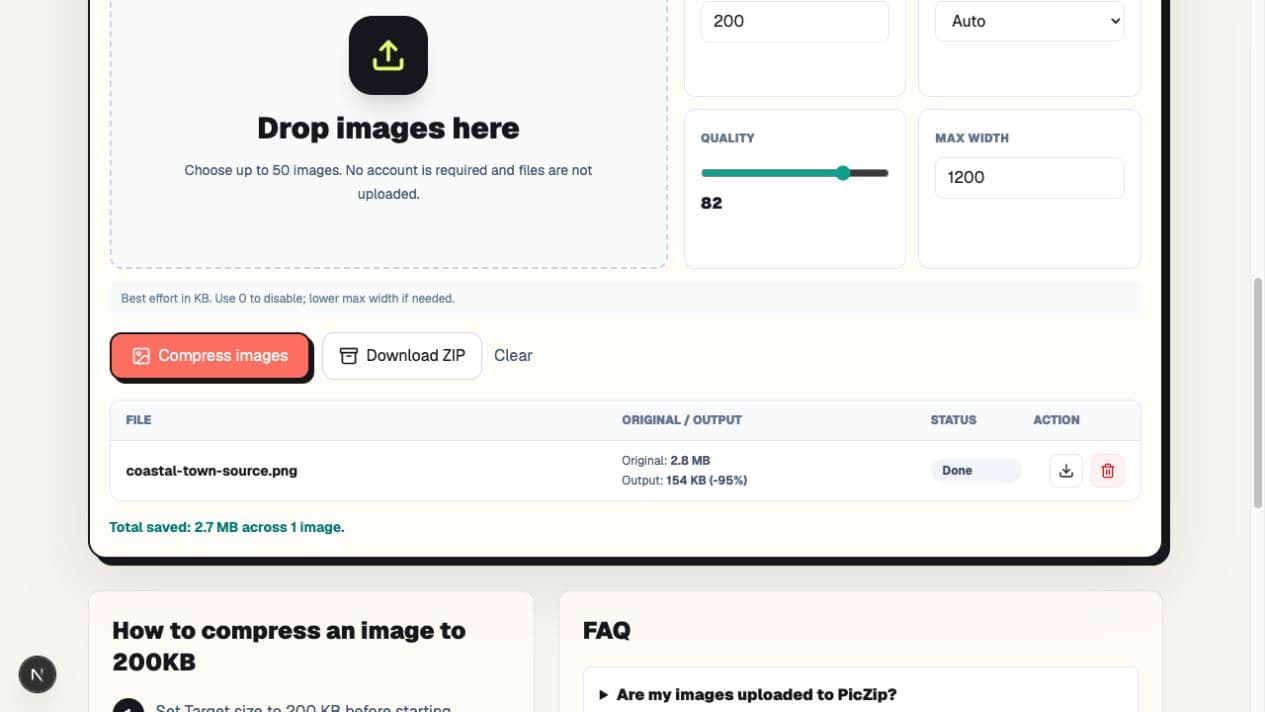
This is useful for a profile photo shown small. It is not automatically appropriate for a scan with tiny text or a portal with a minimum-width rule.
A practical troubleshooting order
- Compare original and output exact bytes.
- Confirm the destination's accepted formats.
- Use Auto, JPG, or WebP for a photograph when allowed.
- Inspect quality at the original dimensions.
- Reduce maximum width only to a size the destination can use.
- Run each attempt from the original, not a previous compressed output.
- Verify format, dimensions, bytes, and visual detail before submission.
PicZip's PNG compressor is appropriate when PNG itself is required. Use the main compressor when you can compare Auto, JPG, PNG, and WebP.
Frequently asked questions
Why did compression make my image larger?
The new encoder or forced format may represent the content less efficiently than the original. Keep the original whenever the output grows.
Why did the target size not work?
Targets are constrained by format, dimensions, image detail, and available quality settings. A lossless PNG may not reach a photo-sized target without other changes.
Should I lower quality or width first?
Try an appropriate format and moderate quality at the original dimensions first. Reduce width when the destination genuinely needs fewer pixels; this often creates more headroom than forcing extremely low quality.
Can I keep compressing the output repeatedly?
Avoid it. Start each attempt from the original because repeated lossy encoding can add artifacts while making comparisons harder to interpret.
The practical answer
A large result is usually a signal to inspect format, target interpretation, and pixel count in that order. Our PNG failure became a sub-200KB WebP without resizing, and a 1200px limit created extra margin. Your source may behave differently, so change one variable at a time and retain the original throughout the process.