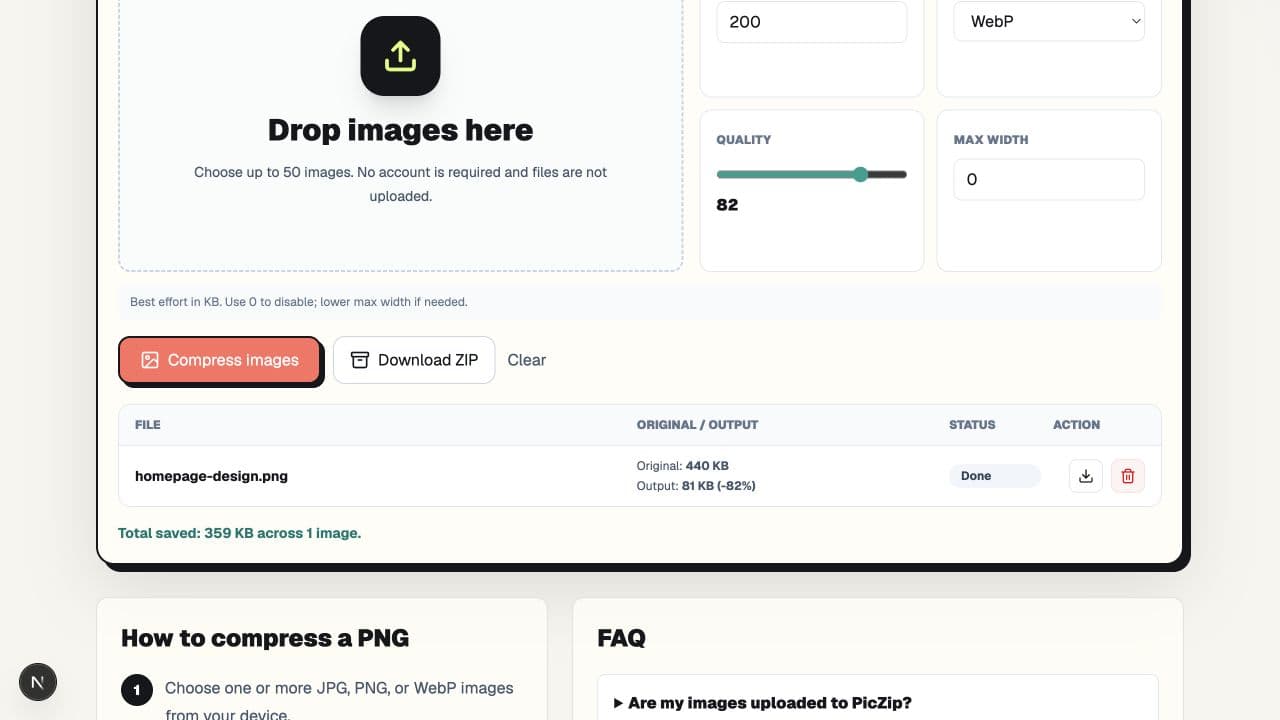
To compress a screenshot without making text blurry, keep the original pixel dimensions on the first run. Format and encoding should change before width. In PicZip, set Max width to 0, try PNG when exact edges matter, or WebP when a much smaller sharing file matters, then inspect small text at 100% zoom.
Our 1440×1200 PNG screenshot was 450,313 bytes. An explicit PNG re-encode grew to 927,696 bytes, while a quality-82 WebP at the same dimensions was 82,578 bytes. Reducing width to 1000px cut WebP to 49,558 bytes, but it also removed about 51.8% of the original pixels.
What we tested
The source is PicZip's own homepage mockup. It includes headings, paragraph text, buttons, borders, and small labels, making it a more relevant screenshot fixture than a photograph. We used a 200KB target and quality 82.
| Run | Dimensions | Exact size | What changed |
|---|---|---|---|
| Original PNG | 1440×1200 | 450,313 bytes | Nothing |
| PNG output | 1440×1200 | 927,696 bytes | Lossless re-encode |
| WebP output | 1440×1200 | 82,578 bytes | Format and encoding |
| 1000px WebP | 1000×833 | 49,558 bytes | Format plus resize |
The 1000px version was 33,020 bytes smaller than the full-size WebP, but byte savings are not the only measure. Its pixel count fell from 1,728,000 to 833,000. Small interface labels therefore have fewer source pixels available before the email client, document editor, or website applies any additional scaling.
Step 1: Keep the original dimensions
Open the PicZip PNG compressor and add the original screenshot. Set Max width to 0 for the first run. This isolates encoding from resizing, so you can tell whether reduced dimensions are actually necessary.
Do not paste the screenshot into a chat app and then download it again before testing. Many apps resize or recompress pasted images, making the new file an unreliable source master.
Step 2: Choose PNG or WebP deliberately
PNG is appropriate when you need lossless edges, transparency, or an editable reference image. But lossless does not mean smaller. Our explicit PNG output was more than twice the source size, so the correct action was to keep the original PNG rather than download the larger re-encode.
WebP is useful for sending a screenshot, embedding it in a guide, or publishing it on a modern website. At full dimensions, our WebP result was 82,578 bytes, 81.66% smaller than the original. That result still needs visual review; exact bytes cannot prove that every small label remains acceptable.
Step 3: Inspect text before reducing width
Open the downloaded result at 100% zoom. Check the smallest labels, light text on colored backgrounds, thin icons, diagonal lines, and text near high-contrast borders. If those areas look acceptable, there is no reason to reduce width merely to produce a more dramatic percentage.
Also inspect the screenshot at its final display size. A 1440px image shown at 720 CSS pixels has more source information than a 1000px image shown in the same space, though browser scaling and screen density also affect the final appearance.
When a smaller width is reasonable
Reduce width only when the destination will never show the screenshot near its original size. For example, a support article with a 700px content column may not need a 3000px source. Choose a width based on the actual layout, including high-density displays, rather than an arbitrary file-size target.
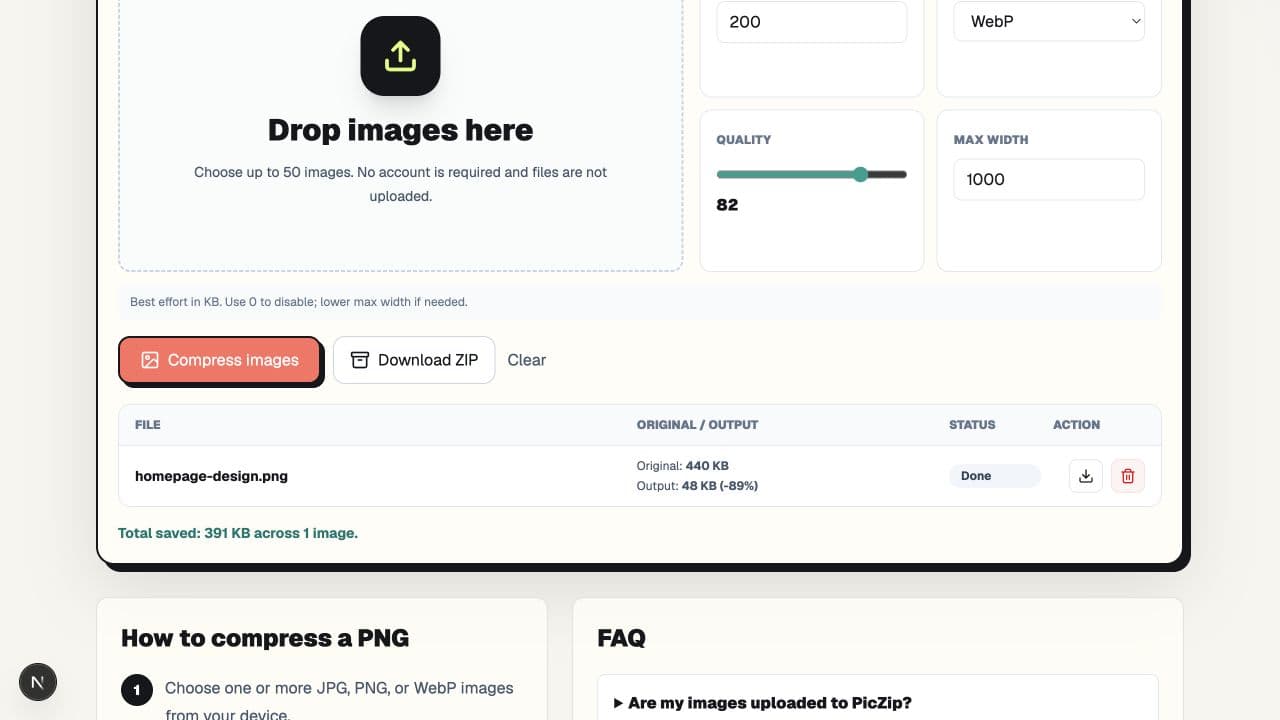
This smaller version may be sufficient for a narrow article, but it is a worse master file. Keep the original screenshot so you can produce a different size later without re-encoding an already reduced copy.
A screenshot review checklist
- Start from the original capture, not a copy downloaded from messaging software.
- Keep original dimensions for the first compression attempt.
- Use PNG when lossless edges or transparency are required.
- Try WebP for web delivery, then inspect the result at 100% zoom.
- Check the smallest text and icons, not only the large heading.
- Reduce width only after confirming the final display size.
- Keep the original as the reusable master.
Frequently asked questions
Why did PNG compression make my screenshot larger?
PNG is lossless, and a new encoder can produce a larger representation than the source. Keep the original when the output grows. A completed encoding is not automatically an improvement.
Is WebP good for screenshots with text?
It can be useful for web delivery, but inspect small labels and edges. Use PNG when exact lossless pixels or maximum editing fidelity matters.
What quality setting prevents blurry text?
No single value works for every screenshot. Content, dimensions, encoder, and final display size all matter. Start at 82 in PicZip, preserve dimensions, and judge the actual output.
Should I resize a screenshot before compressing it?
Only when the destination needs fewer pixels. Resizing first permanently removes source detail and can make it harder to separate resizing damage from encoding artifacts.
The practical answer
Preserve dimensions first, choose a format based on the destination, and inspect the smallest text before touching width. Our full-size WebP was already below 100KB, so the 1000px resize was unnecessary for that target. Test your own original in PicZip and keep the source file after exporting the delivery copy.